
How to build a pool
How to design and build a swimming pool from scratch on a heavily sloping site
In 2017 I embarked on a project to design and build a complete swimming pool from scratch without using any contractors. As with all construction projects, delays ensued and what I originally envisaged to be a three-month project took more than six months to complete (or twelve including breaks for winter, travel etc.).
Below are a series of articles in chronological order documenting the very laborious, but always interesting process.
Tiling the retaining walls
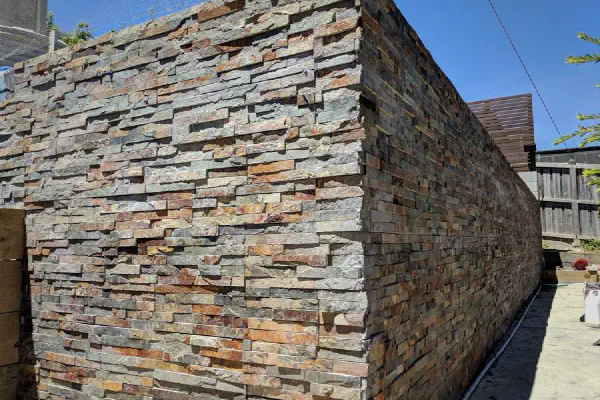
As discussed in the last tiling post, we’re using a slate stacked stone to provide texture on the retaining walls and to give a nice dark contrast against the ivory travertine deck and coping. The texture of the stacked stone will also provide great shadows for the on wall lighting.
Laying the coping tiles
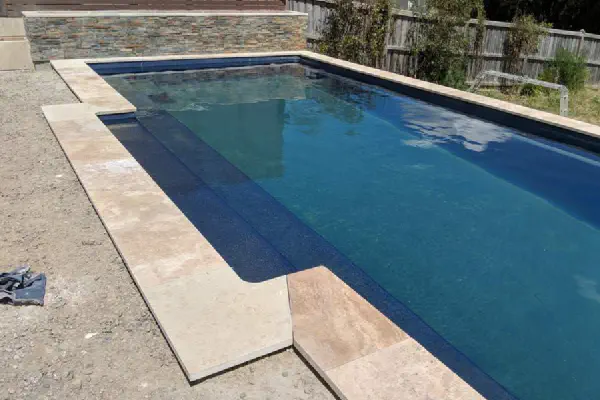
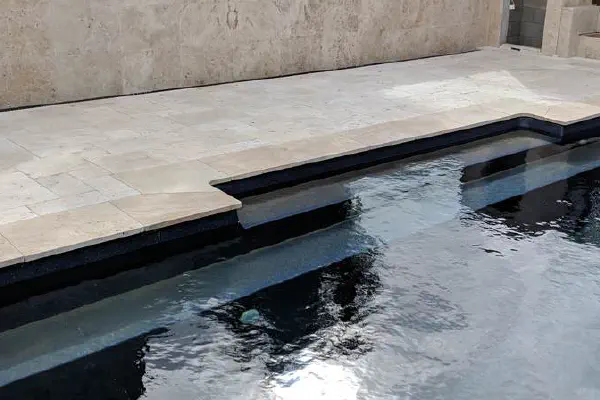
Around the pool perimeter we’re laying 30mm ivory travertine stone and continuing it onto the pool deck. The 30mm thickness provides a nice lip for the pool edge. The two main edging options for the lip are square edge or bullnose (i.e. rounded). Our stone tiles already have a square edge (bullnose edging typically costs more) and we’ll be keeping it.
Solar heating preparations
Once the core project is complete, we’ll be having someone install solar-thermal panels on the roof of the house. It’s the one job I’ve decided to outsource as I’m not keen on spending a few days on the second story roof securing them. I also don’t have the requisite safety gear to work up there and am not keen on buying it just for one job.
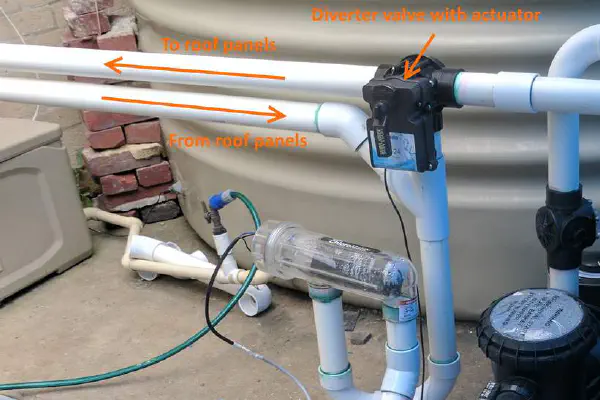
Customizing the solar control electronics

With a plethora of manufacturers and models for pool solar controllers, it can be challenging to put together a system that just works, without resorting to sourcing everything from a single manufacturer and buying their overpriced controllers.
Designing and building the pool stairs
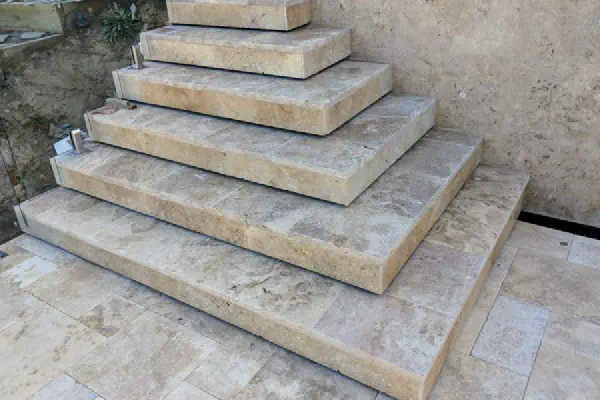
When I designed the pool, I placed the entrance in the corner nearest the main residence. The elevation of the pool deck at this point is 1200mm below that of the wooden deck above it, which is at the same level as the house. Stairs are thus required. Once through the gate I wanted the whole area to feel open and so designed the stairs to descend in both directions. The alternative of stairs descending towards the pool with a rail on the side would look quite awkward, creating a wall on the deck side of the stairs.
Paving the pool deck
Per the tiling post, the pool deck is being paved with the same ivory travertine used for the pool coping and the rear wall. The pattern will be quite different though.
How to move a mountain
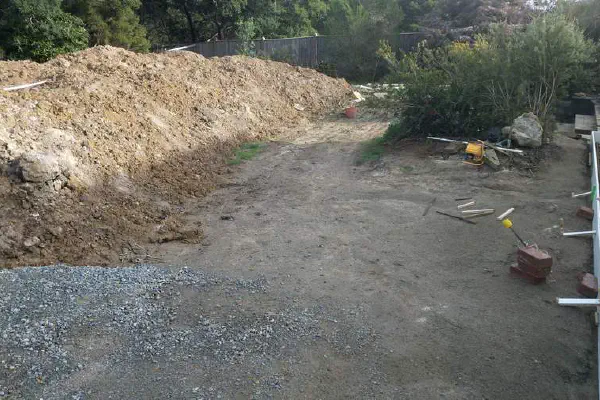
The process of excavating for the pool generated a lot of dirt. Having it removed would be extremely costly so we decided to use it to partially level the yard below the pool. This area is around 25 meters wide and 10 meters deep. The elevation difference from one side to the other is around 1.5 meters and from top to bottom around 1 meter.
An unobtrusive pool fence
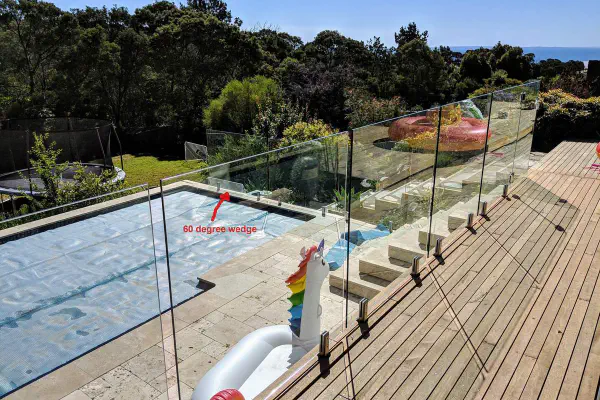
Regulations in these parts are quite strict with respect to pool fencing. Anything containing - or able to contain - 300mm of water or more must be fenced in accordance with a set of strict, but unfortunately somewhat ambiguous, standards. Even during construction, we had to ensure everything was fenced in accordance with the standards.
Comfort and utility - a seat and a cupboard

Not content to labor myself with only a pool, deck, stairs, fence, etc., my initial design calls for a wooden seat and storage cupboard at one end of the pool deck.
Integrating the pool and house with a wooden deck
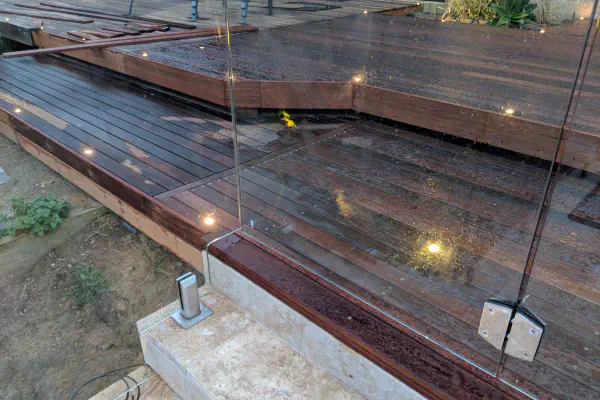
A key objective of the original design was to ensure that the pool and deck were integrated with the home, rather than being a separate element, fenced off and visibly independent.
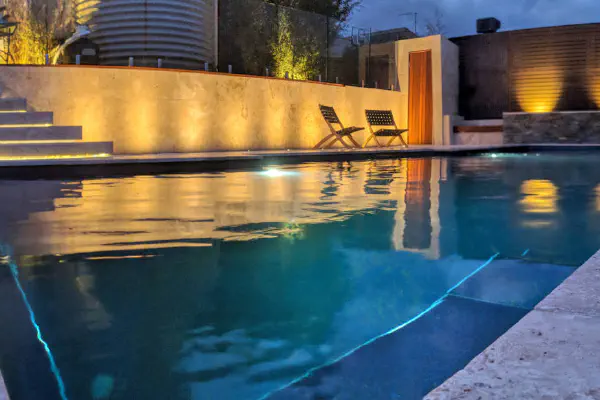
Lighting the pool and surrounding environment
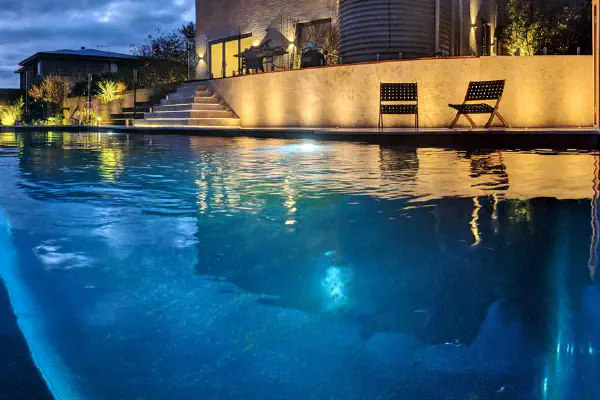
A well designed lighting setup can dramatically increase the subjective comfort of a space, while a poor design might just as easily turn a naturally inviting area into one where you really don’t want to spend any time at all.
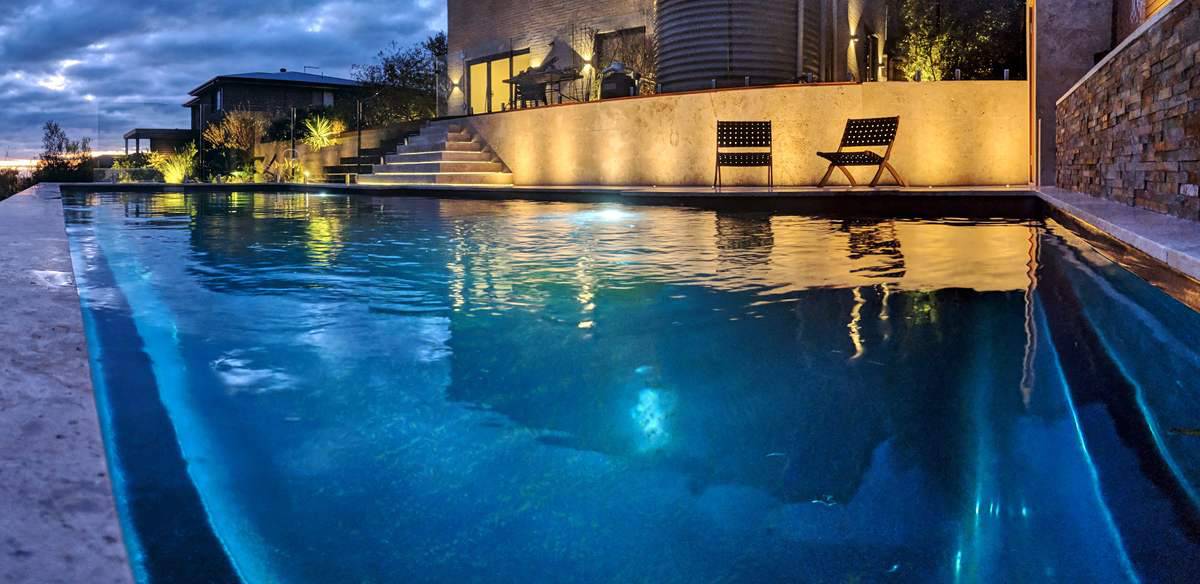
The pool is officially complete!
It was a long journey, but the pool construction project is officially complete :). All regulatory approvals have been given and there is no more construction work to do.