Once the core project is complete, we’ll be having someone install solar-thermal panels on the roof of the house. It’s the one job I’ve decided to outsource as I’m not keen on spending a few days on the second story roof securing them. I also don’t have the requisite safety gear to work up there and am not keen on buying it just for one job.
In preparation for the installation, we need to ensure the requisite electronics and plumbing are in place.
Control electronics
Solar-thermal heating works by pumping water through a series of tubes or panels, which are placed to absorb as much solar radiation as possible. This type of heating will only function to increase the temperature of the water in the pool when the temperature of the aforementioned tubes and panels exceeds that of the water. To maximize the potential of such a system, some form of automation is required. Specifically, something to evaluate the temperature of the roof and pool water and run the system as appropriate.
The typical solar controller accomplishes this by having temperature sensors on both the roof and in the water. It then - based on a user-controlled desired temperature setting - routes water to the roof panels/tubes via an automated diversion valve and/or separate solar water pump. We are using just such a controller. Namely the Hayward GL-235.
Temperature sensing
The water temperature sensor is traditionally installed in the plumbing soon after the pump. The problem with this approach is that the temperature of the water in the pipe will only match that of the pool water while the pump is operating. Once the pump is off, the temperature of the water in the pipe will slowly converge with the temperature of the air surrounding the pipe.
A better approach in my opinion is to place the sensor in the actual pool water. This is typically not done, presumably because it is logistically much more difficult. In addition to needing to run cable all the way to the pool, there’s the question of where and how to locate the sensor. I chose to mount it inside the skimmer, providing direct access to the pool water while hiding it from sight.
After considering for some time how to mount it, I settled on clamping it in place between two strips of PVC. The PVC was obtained from a 50mm piece of pressure pipe, made flat after heating.
The sensor was connected to the equipment pad via shielded twisted pair running in a conduit buried next to the side retaining wall, along with the lighting conduits.
Sending the water to the roof

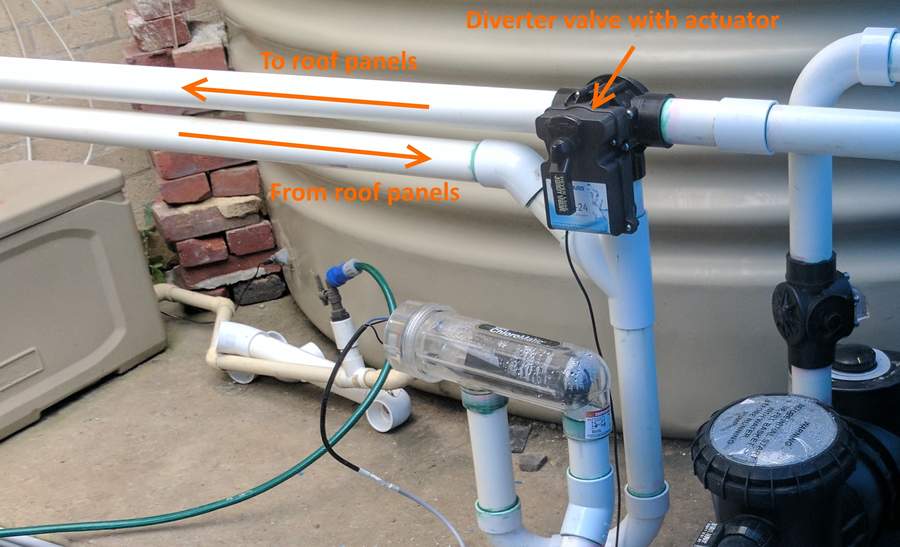
Diverter valve with actuator installed.
When the sensors indicate that the roof is warmer than the pool water (and the desired temperature is set above the current water temperature), the controller enables the solar by setting the diverter valve to direct water to the roof panels and switching on the pump (if it is not already on). Diverting the water is simple. Having the solar controller turn on the pump is more challenging that it seems, and is the subject of the next post.


